Best Kegging System(Review 2023) – How to choose the kegging system for Homebrew?
When we think of a craft beer we usually imagine it being pulled out of a keg down at the bar. However, when we homebrew, more often than not, we opt for bottling our beer but bottled beer tastes different to kegged beer. Indeed, nothing can beat the smooth flow of a beer poured from a keg so why not add that into your home brewed repertoire?
You might want to see this first: Best Hydrometers for Homebrewing.
In this post, we will take you through the benefits of a kegging system, the essential equipment to homebrew beer that you will need, how to keg your own homebrew, and some of our favorite bits of kit to get you serving the best homebrew your nearest and dearest have ever tasted.
What are the benefits of a kegging system?
When it comes to brewing your own beer at home, one of the most time-consuming tasks is bottling up your carefully crafted beer for conditioning. If you take the kegging route, you’ll soon find you save hours on painstakingly sanitizing all your bottles. So although there is an initial outlay in cash, there is a long term time saving that is going to be a major plus if you plan to brew your own batches regularly.
As already mentioned, beer drawn from a keg tends to taste a whole lot crisper and fresher as there is no air in contact with the beer inside the keg, as there would be a tiny bit of in a bottle. In a keg, all of the oxygen is displaced by CO2 helping to ensure it keeps well and tastes all the better. You also won’t be left with the annoying bit of sediment in the bottom of all your bottles as this won’t make it out of your keg.
Another major benefit of kegging your beer is that you don’t need to add priming sugar to carbonate your beer since this is achieved with C02. So you could argue your kegged homebrew is actually a way to be healthier as a persuasive argument to free the funds up for your investment in a kegging system for the home. Kegged beer also carbonates quicker than bottled beer and is easier to adjust in terms of how much carbonation occurs to suit your tastes.
What equipment do you need for a home kegging system?
If you’ve decided to take the plunge on a home kegging system, then a great way to get started is a starter kit that comes with everything you need in one go. These can usually be bought for around $200. Then, if you want to add multiple kegs to your setup you can do this gradually over time if you want to expand your brewing capacity. Annoyingly, these sets typically send you an empty Co2 tank, so be prepared to have that filled if you do opt for an all-in-one kegging kit. But what’s in the kit?
#1 The Keg
Obviously, you can’t have a kegging system without a keg. There are also actually two types of keg, the Cornelius keg and the pin lock keg. A Cornelius keg is made from stainless steel and is typically used commercially that is capable of holding a maximum pressure of 130 PSI. Cornelius kegs can have either a pin-lock or a ball lock (but your system can only cope with one of these options) and all kegs have two connections. These are called quick-disconnects, with one responsible for supplying the CO2 and one for dispensing the beer.
#2 The CO2 Tank
CO2 tanks come in a range of sizes between 2.5 pounds up to as much as 20 pounds. If you plan to carbonate more than one keg, then you will want to use a larger C02 tank. 5-pounds is sufficient for a single keg at a time and can make around 6 full batches. It’s a good idea to exchange your tanks rather than have them refilled if possible as otherwise, they will need to be hydrostatically tested every five years for the Department of Transportation. If the pressure of your tank is below 600 psi, you will know you need to get a refill however you plan to do it.
#3 Regulator
A CO2 regulator is a valve that controls the pressure of the CO2 being released from the tank. The regulator can be used to increase or lower the pressure passing through the valve and also lets you know how much gas is left in the tank. It’s important to ensure the regulator is securely fastened before you make any adjustments to the pressure entering the keg as messing around with high-pressure gas is dangerous! Fortunately, regulators come with two dials to help you monitor the pressure you are putting into the keg.
#4 Beer Tap
You can’t get the beer form your keg without a beer tap. A beer tap is simply a faucet that can be hammered into the appropriate spot on your keg and give you the necessary access to your liquid gold. Picnic taps are a good option to go for when it comes to choosing a beer tap as they are easy to use, cheap, and effective.
#5 Refrigerator
The one downside of kegged beer is that it can be more liable to go off quickly if not kept well once it has been tapped. This means you are going to need a cool place to store it, with the easiest way to do this typically being some form of refrigeration. The key temperature range you need to keep your beer at is between 33-55 degrees Fahrenheit.
Step-by-Step guide to keg your own beer
With all the necessary equipment at the ready and your beer has completed its fermentation processes you can now move on to conditioning your beer and learning how to keg your homebrewed beer.
#1 Release pressure from your keg your keg
Make sure you have removed any pressure left in as the first step in your preparations using the in-built release valve. High pressure and loosened parts can be very dangerous so it is vital not to forget this step.
#2 Take apart your keg
Be careful to remember where the keg’s fittings, gaskets, and other components that you disassemble from the keg go to make it easier to put back together when ready.
#3 Sanitize the keg
Even if it is brand new you should still do this and you do not want anything to contaminate your brew as it conditions in your keg. If you have used it before, there will be some residue from your last brew. You can remove this with a couple of ounces of powdered brewery wash and about half the keg’s capacity of water. You should also put all the components in this mix. Be careful not to use a harsh scouring pad on the inside of the keg to avoid scratches that can allow contaminants to evade sanitization. It’s a good idea to leave the parts soaking overnight and then repeat the process once more to ensure everything is completely sanitized.
#4 Rinse the components
Once everything has been fully sanitized, you need to give everything a thorough rinse as you don’t want a nasty chemical taste getting into your brew.
#5 Put the keg back together
This is where your memory (and ability to follow instructions properly) will be fully tested!
#6 Sanitize the keg again!
This might seem like overkill, but it’s not. Now the keg is back together you can truly ensure it is sanitized. Fill it with water and powdered brewery wash with an hour the right way up and hour upside down to ensure everywhere is reached. Drain this out and rinse thoroughly with hot water.
#7 Pressurize your keg
It’s important to check that the gasket is fully sealed and fastened before pressurizing your keg. Remember that gas pressure varies by temperature so check what psi you will need based on the temperature you are planning to keep your beer at on a forced carbonation chart. At 40 degrees Fahrenheit, 10-11 psi should do the trick.
#8 Chill your beer
Within a week your homebrew is going to carbonate and be ready to taste all you have to do is keep it at the right temperature.
How to choose the best kegging system
So now you know some of the benefits of kegging, what equipment you need, and how to do it all you need now is to go out and find the kit. Here we outline some of our favorite kegging systems to help get you started.
Top 5 Best Kegging System 2023
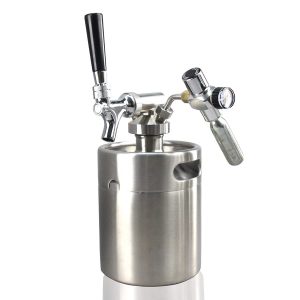
#1 Best Portable Kegging System: Keg Smiths’ 128oz (3.5 liter) Portable Draft Keg System with CO2 regulation
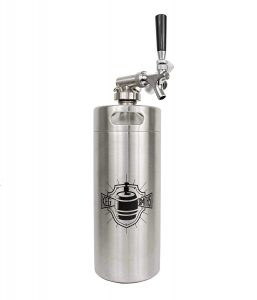
If you love homebrew and like the idea of giving kegging your own beer a try but also want to be able to share your wonderful craft with your friends, then you should check out this portable kegging system. With a capacity of just 8 pints, it’s easy to transport but big enough for a hearty session alongside a few hands of poker or shooting some pool with good friends.
The pros of this kegging system are that: it is nice and easy to follow the included instructions; it is simple to clean and sanitize; it is made from stainless steel so is sturdy, and; it comes with a tap to make it easy to pour a nice draught beer whenever you want. The downside of this setup is that it doesn’t come with a CO2 cartridge (you will need a threaded cartridge system).
#Kegs #Kegged_Beer #Kegging_System #Portable_Kegs #Homebrew
#2 Best Cornelius Kegging System: The Weekend Brewer’s Mini Keg with Ball Lock Tapping System
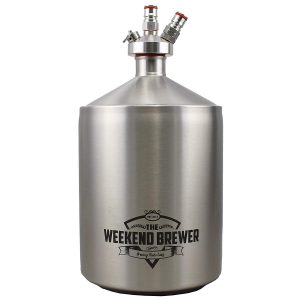
For those who want to give a Cornelius keg a try, this is the option for you. With 5-liter capacity, this keg is not huge which means it is also pretty portable if you fancy taking your brew on the road and still holds a decent 10 pints worth to keep you going. Many people find a Cornelius kegging system easier to use thanks to the double ball lock system which makes carbonation less tricky to achieve.
Other pluses of this kegging system are that: it is compatible with all standard ball-lock disconnects; it has a simple pressure relief valve which makes it easy to safely take apart; it is super sturdy; it fits neatly in most average-sized fridges making it easier to keep at the optimum temperature, and; it is a great price. The downside of this kegging system is that it doesn’t come with a CO2 tank and is quite small.
#Kegging_Systems #Homebrew_Kit #Beers #Craft_Beer #Homebrewing
#3 Best Kit for Kegging your own Beer at Home: Draft Brewer’s Single Homebrew Kegging System
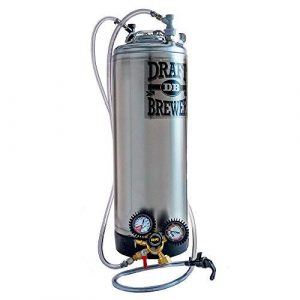
This great bit of kit is designed to make kegging your own beer at home easy even if you are a true novice. The handy dials make it easy to adjust the pressure and really play around with carbonation levels in your homebrew so you can really get to grips with the different effects this has on the flavoring of your homebrews.
Other pluses about this kegging system are that: it is huge with a 5-gallon capacity; it has dual-gauge CO2 regulator as well as a draw beer line to make it easy to pour your beer straight from the keg without needing to buy a tap, and; it rapidly carbonates beer in as little as 2-4 days. The downside of this setup is that it is not that portable and, although it says it includes everything you need out of the box, does not come with a CO2 tank!
#Double_Ball_Lock_Kegs #Home_Kegging #Homebrewing #Beer #Ale #Kegs
#4 Best Value Large Cornelius Keg: Learn To Brew LLC’s 5 Gallon Ball Lock Cornelius Keg
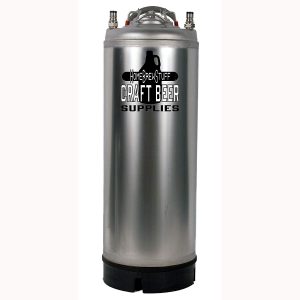
If you don’t have a huge budget but have your heart set on a larger kegging system than portable kits can offer you, then you should check out this basic but effective kegging system. For under $100 it brings you a 5–gallon keg complete with a pressure release valve, has been tested up to 130 PSI and is durable so will last you for many years.
The other benefits of this kegging system are that: it can be used with a kegerator thanks to having ball lock disconnects; it can be refrigerated; it is great value for a keg of this size. The downsides of this system are that it is made from aluminum, it is quite cheaply made, and there are no pressure dials.
#Large_Kegs #Homebrew_Kegging #Craft_Ale #Ales #Keggin_Setup
#5 Best Value Mini-Kegging System: NutriChef’s Pressurized Growler Tap System and Kegerator Kit
This special bit of kit is great for those who don’t get through their beer quickly but want it to retain that crisp, fresh carbonated taste and will keep beer tasting this way for a good two months at a time. It also comes with everything you need except for the CO2 making this a good choice for the novice kegger.
Other things to like about this kegging kit are that: it is made from stainless steel, including all of its component parts; it can hold up to 8 pints; it is highly portable; it comes with a tap to make pouring easy, and; it is great value. The downsides of this system are that it doesn’t have a huge capacity and it is a little bit unstable when full.
#Kegs #Kegging_At_Home #Kegged_Beer #Kegging_Ale #Craft_Beer
Conclusion
So there you have it! You now have all the information you need to get started with kegging your own homebrewed beer in the comfort of your own home. Whether you want to share that with others with a portable system or just want to maximize the amount of beer you’re able to keg in one go, this list has the setup for your needs.
See more maybe you are interested here.